Kubernetes Tutorial for Developers
Welcome to our hands-on tutorial on Kubernetes, the powerful open-source platform often abbreviated as k8s. In this tutorial, we are diving into the world of container orchestration, simplifying the complexities, and making Kubernetes accessible for developers. Whether you are just starting out or looking to enhance your existing skills in Kubernetes, this guide is designed to walk you through the process step-by-step. We will cover the basics of setting up Kubernetes, deploying a simple "hello world" app, and understanding how to manage and scale your containerized applications with ease. Let's start with some of the challenges of Kubernetes followed by the steps to setup and deploy a simple Kubernetes application.

Morgan Perry
January 30, 2024 · 7 min read
Morgan Perry
Co-founder of Qovery. Morgan is a Tech entrepreneur with 10 years of experience in the SaaS industry.
See all articlesKubernetes is the go-to platform for container orchestration because of its scalability, container orchestration, flexibility with different networks and cloud environments, and its declarative approach. However, with all the goodness, it has some challenges too. Let’s start with some of the challenges faced by developers when using Kubernetes.
#Challenges of Managing Kubernetes
#Infrastructure Complexity and Overhead
With Kubernetes, each service, deployment, and update requires a set of configurations and commands, leading to a steep learning curve and room for human error. E.g. Developers often spend hours writing and maintaining Helm charts or Kubernetes YAML files to ensure services are deployed correctly.
#Cluster Provisioning and Maintenance
Setting up a Kubernetes cluster involves intricate steps, and each cloud provider has its own set of tools and services that need to be configured. E.g. Manually creating a cluster on AWS might require setting up EKS, configuring VPCs, and ensuring the right IAM policies are attached to the worker nodes.
#Security Concerns and Access Control
Ensuring proper security measures and access controls are in place can be complex and error-prone, requiring a deep understanding of Kubernetes' security mechanisms. E.g. A developer might accidentally expose sensitive environment variables in a deployment script, leading to potential security vulnerabilities.
#Debugging and Troubleshooting Complex Deployments
Kubernetes' distributed nature can make it difficult to trace issues across multiple pods and services. E.g. When a microservice in a multi-tiered application starts throwing errors, pinpointing the exact cause can involve combing through dozens of log files across various services.
#Difficulty Scaling Applications Efficiently
Auto-scaling in Kubernetes requires tuning and understanding metrics, which can be a trial-and-error process. For example, an application might be experiencing sporadic performance issues due to misconfigured auto-scaling thresholds, causing it to not scale up as traffic increases.
Now that you know the challenges of Kubernetes, let’s try a hands-on example to create a simple Kubernetes cluster and deploy a basic Hello World app to that cluster.
#Kubernetes Setup and Installation
For Windows, setting up Kubernetes is very easy through Docker Desktop. For Linux and Mac, the same can be done through Minikube or a similar Kubernetes cluster. The below steps are for Docker Desktop.
#Installation of Docker Desktop
Start by installing Docker Desktop:
- Visit the Docker official website.
- Download the appropriate version for your operating system.
- Follow the installation instructions specific to your platform. https://docs.docker.com/desktop/install/windows-install/
#Basic Understanding of Docker Concepts
Before proceeding, ensure you are familiar with fundamental Docker concepts:
- Images: Read-only templates used to create containers. Images define the application and its dependencies.
- Containers: Runnable instances of Docker images, encapsulating the application, its environment, and a standard set of instructions.
- Dockerfile: A Dockerfile is a text document containing all the commands a user could call on the command line to assemble an image.
- Volumes: Volumes are used to persist data generated by and used by Docker containers.
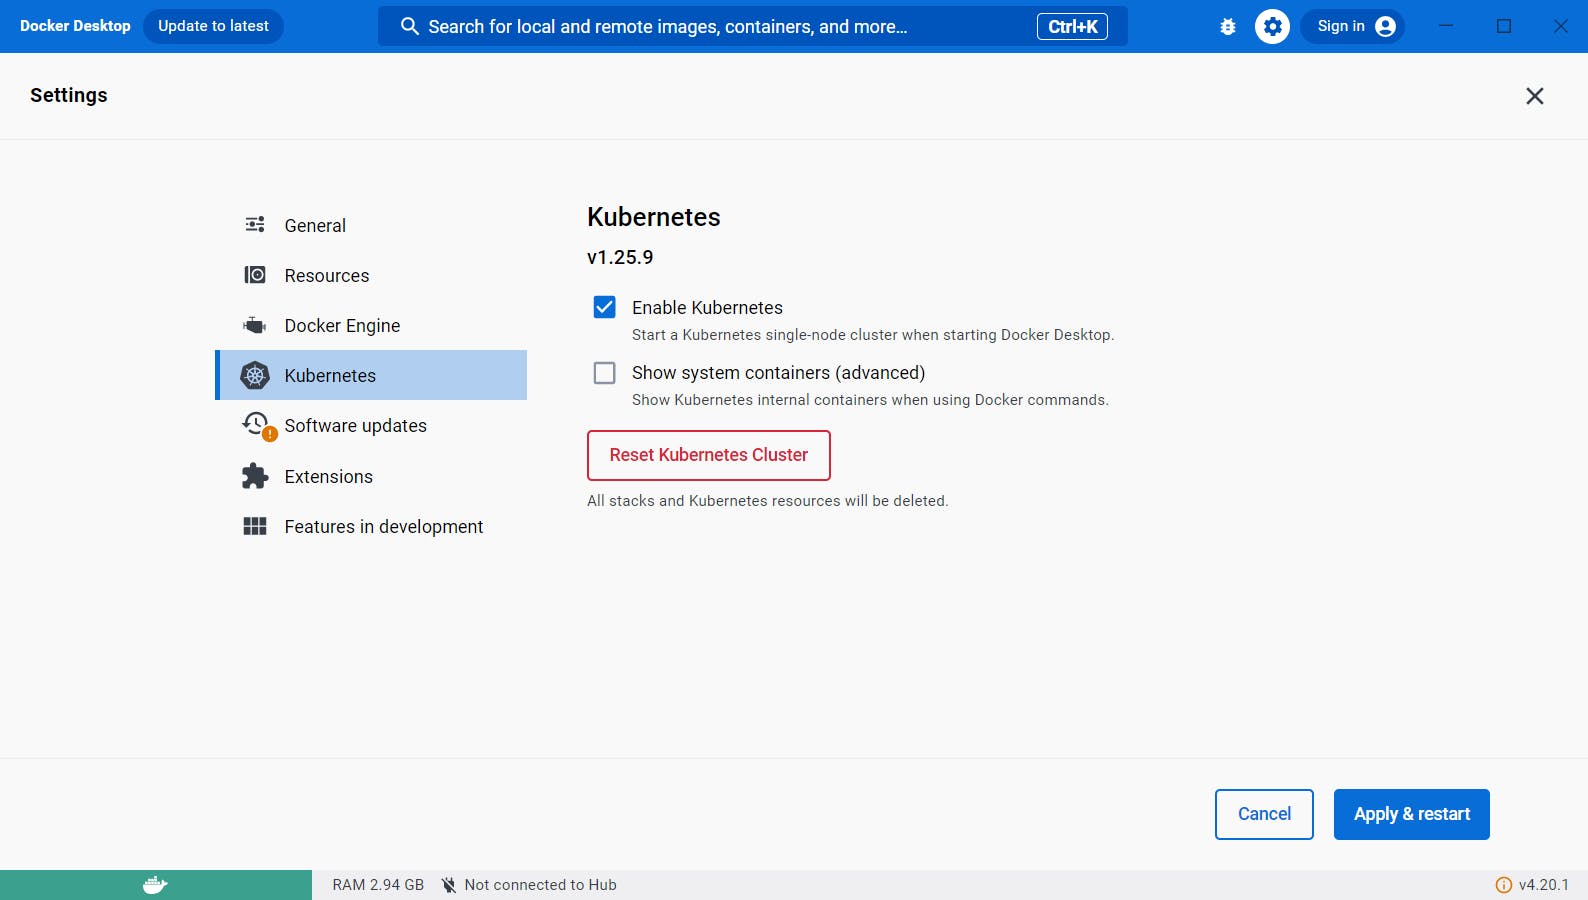
#Enabling Kubernetes in Docker Desktop
Once Docker Desktop is installed, enable Kubernetes:
- Open Docker Desktop.
- Navigate to Preferences or Settings.
- Locate the Kubernetes section.
- Check the box to Enable Kubernetes.
- Click Apply & Restart to initialize Kubernetes integration.
Below is a screenshot for reference, illustrating the Docker Desktop settings window with Kubernetes enabled:
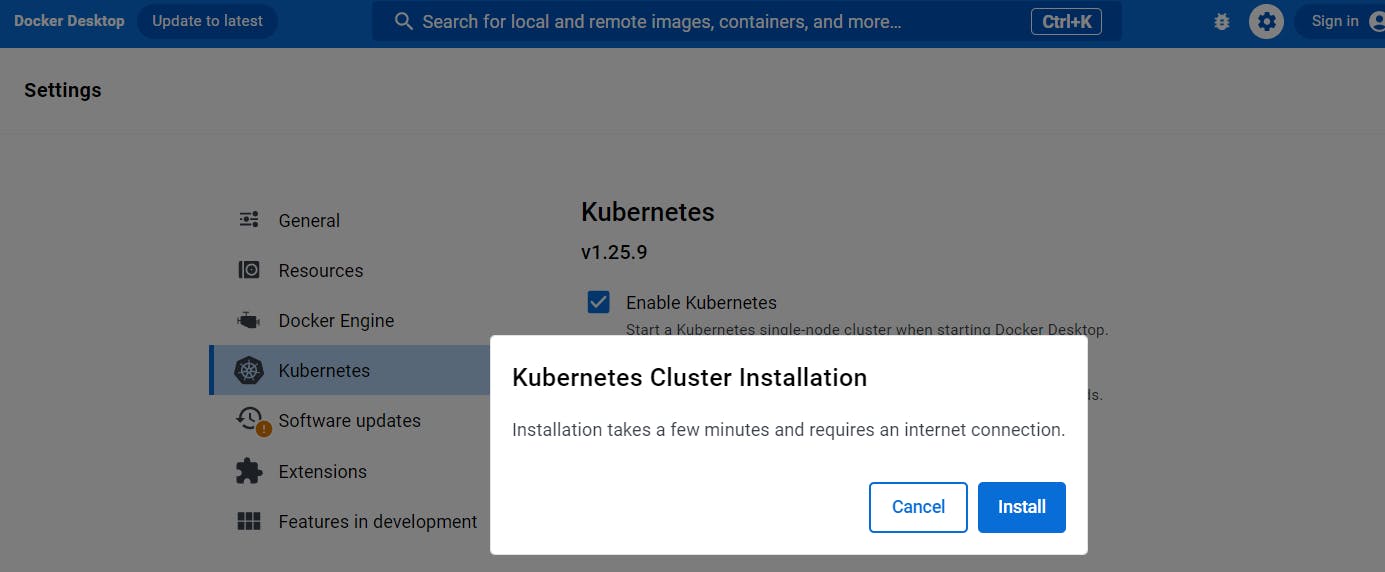
It will take a couple of minutes depending on your internet speed and your machine’s specifications.
#Verifying Kubernetes Cluster Setup
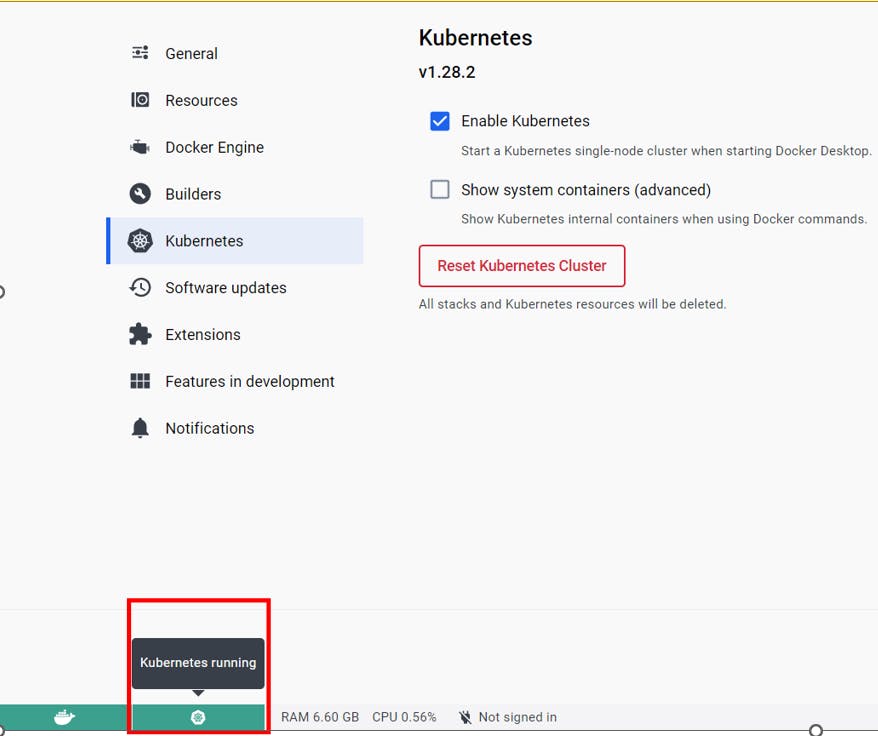
#Verification from Docker Desktop
The first indication of a successful Kubernetes setup is the Kubernetes tab on the bottom will turn green. See the below screenshot for reference.
#Verification through Kubectl
Another way to confirm is to use Kubectl command line tool. Here are the steps for that:
- Check if kubectl is installed: Open a PowerShell or Command Prompt window and type kubectl version. If it's not installed, download and install it from the official website: https://kubernetes.io/docs/tasks/tools/install-kubectl-windows/
- Check cluster connectivity: Run kubectl cluster-info. This should display information about your cluster, including its name, endpoint, and version.

- Check node status: Run kubectl get nodes. This will display a list of nodes in your cluster and their current status (Ready, Not Ready, Unknown).
- Check pod status: Run kubectl get pods --all-namespaces. This will show all pods in your cluster, their status (Running, Pending, Error), and other details.
Note that here kubectl is acting as the client where as Kubernetes cluster is working as server. Now that you have successfully installed your Kubernetes cluster, let’s deploy a simple web application.
#Create Your Kubernetes Deployment
Here are the steps to deploy your first web application through Kubernetes.
#Create Your Own Docker Image
In a typical scenario, you would start by creating a Docker image of your application. This involves:
- Writing a Dockerfile: This file contains a set of instructions to build the image, including the base image to use, files to copy into the image, commands to run, and ports to expose.
- Building the Image: Using the Docker CLI, you would build your image with the docker build command.
- Pushing the Image to a Registry: After building your image, you would push it to a Docker registry like Docker Hub or Google Container Registry.
For this example, we are using a pre-built image (gcr.io/google-samples/hello-app:1.0), these steps are unnecessary for this guide and thus are skipped.
#Write a Deployment YAML File
Create a file named hello-deployment.yaml with the following content. This YAML file describes a Deployment that manages a Pod with one container based on the gcr.io/google-samples/hello-app:1.0 image.
apiVersion: apps/v1
kind: Deployment
metadata:
  name: hello-world
spec:
  replicas: 3
  selector:
    matchLabels:
      app: hello-world
  template:
    metadata:
      labels:
        app: hello-world
    spec:
      containers:
      - name: hello-container
        image: gcr.io/google-samples/hello-app:1.0
        ports:
- containerPort: 8080#Deploying an Application
#Create the Deployment in Kubernetes
Run the following command in your terminal to create the Deployment. It instructs the Kubernetes cluster to start three instances (replicas) of the Hello World app.
kubectl apply -f hello-deployment.yaml
You should see the message “hello-world created”. See below for reference.

Now that the application (or deployment) is deployed to your Kubernetes cluster, let’s see how to access it.
#Accessing Your Application
Your Hello World application is created and deployed in the Kubernetes cluster but it is not ready to be accessed from outside the cluster. Let’s create a service to access this.
#Expose the Deployment as a Service
Create a hello-service.yaml file with the following content to define a Service that exposes the Hello World app on an external IP address.
apiVersion: v1
kind: Service
metadata:
  name: hello-service
spec:
  selector:
    app: hello-world
  ports:
    - protocol: TCP
      port: 80
      targetPort: 8080
  type: LoadBalancer
Create this service by executing the command “kubectl apply -f hello-service.yaml”. Now that your service is created, just access it on “http://localhost:80” See the below screenshot for reference:

Note that in a local development environment like Docker Desktop, services of type LoadBalancer don't get an external IP like they would in a cloud provider's environment. Instead, you can access your service on localhost or the local IP of your machine.
#Why use Qovery for Kubernetes Management?
Qovery cuts through the complexities of Kubernetes management, empowering developers to deploy and manage applications faster and more efficiently.
#Key benefits for developers
- One-click deployments: Eliminate manual configuration and errors with pre-built environments and instant deployments directly from your Git repository.
- Automatic cluster provisioning: Ditch the hassle of infrastructure setup. Qovery handles cluster creation, scaling, and updates on your chosen cloud provider, freeing you to focus on code.
- Simplified application management: Manage environments, deployments, and configurations through a user-friendly web interface or intuitive CLI.
Here is a 44-second video demonstrating how Qovery reduces the time to perform Kubernetes-related tasks.
#Example: Say goodbye to manual cluster provisioning
John, a busy developer, needs to deploy a new microservice to production. Traditionally, this would involve manual cluster provisioning, configuration, and deployment steps. With Qovery:
- John pushes his code to the Git repository.
- Qovery automatically detects changes and triggers a one-click deployment.
- Behind the scenes, Qovery provisions a new Kubernetes cluster, configures it based on pre-defined settings and deploys the application.
- John receives a notification within minutes, and his microservice is live in production.
Qovery empowers developers like John to spend less time wrestling with Kubernetes and more time building and innovating. Its developer-centric approach streamlines operations, reduces errors, and accelerates time to market. Check out this post that walks you through how Qovery simplifies Kubernetes for developers.
#Conclusion
Kubernetes, while robust, presents developers with significant challenges, from the complexities of initial setup and ongoing maintenance to scaling and securing applications. These hurdles can slow down even the most seasoned developers. Qovery steps in as a streamlined solution, offering a way to bypass these obstacles with its one-click deployments, automatic cluster provisioning, and simplified management features. By handling the heavy lifting of infrastructure tasks, Qovery not only mitigates the challenges but also accelerates developer efficiency, freeing them to focus on what they do best—coding. Let’s try Qovery for free and see how it lifts the heavy burden of Kubernetes management and increases developer's productivity.
Your Favorite Internal Developer Platform
Qovery is an Internal Developer Platform Helping 50.000+ Developers and Platform Engineers To Ship Faster.
Try it out now!
Your Favorite Internal Developer Platform
Qovery is an Internal Developer Platform Helping 50.000+ Developers and Platform Engineers To Ship Faster.
Try it out now!