Qovery V3: Advanced Settings Building the Path to Beta Testing
Right at the beginning of the summer was the launch of our console V3 in Alpha testing; as explained in this article, the main goal of this V3 was to solve the UX issues present in the V2; it's also fully open source and rewritten from scratch in React. We gathered many feedbacks, and our Frontend team is continuing to add every feature already available on the V2 to go from Alpha to Beta testing at the end of September. Last week, we launched the advanced settings panel and while you can already use it in the CLI in the V2, let me show you how it looks and how to use it in the V3.

Albane Tonnellier
September 20, 2022 · 3 min read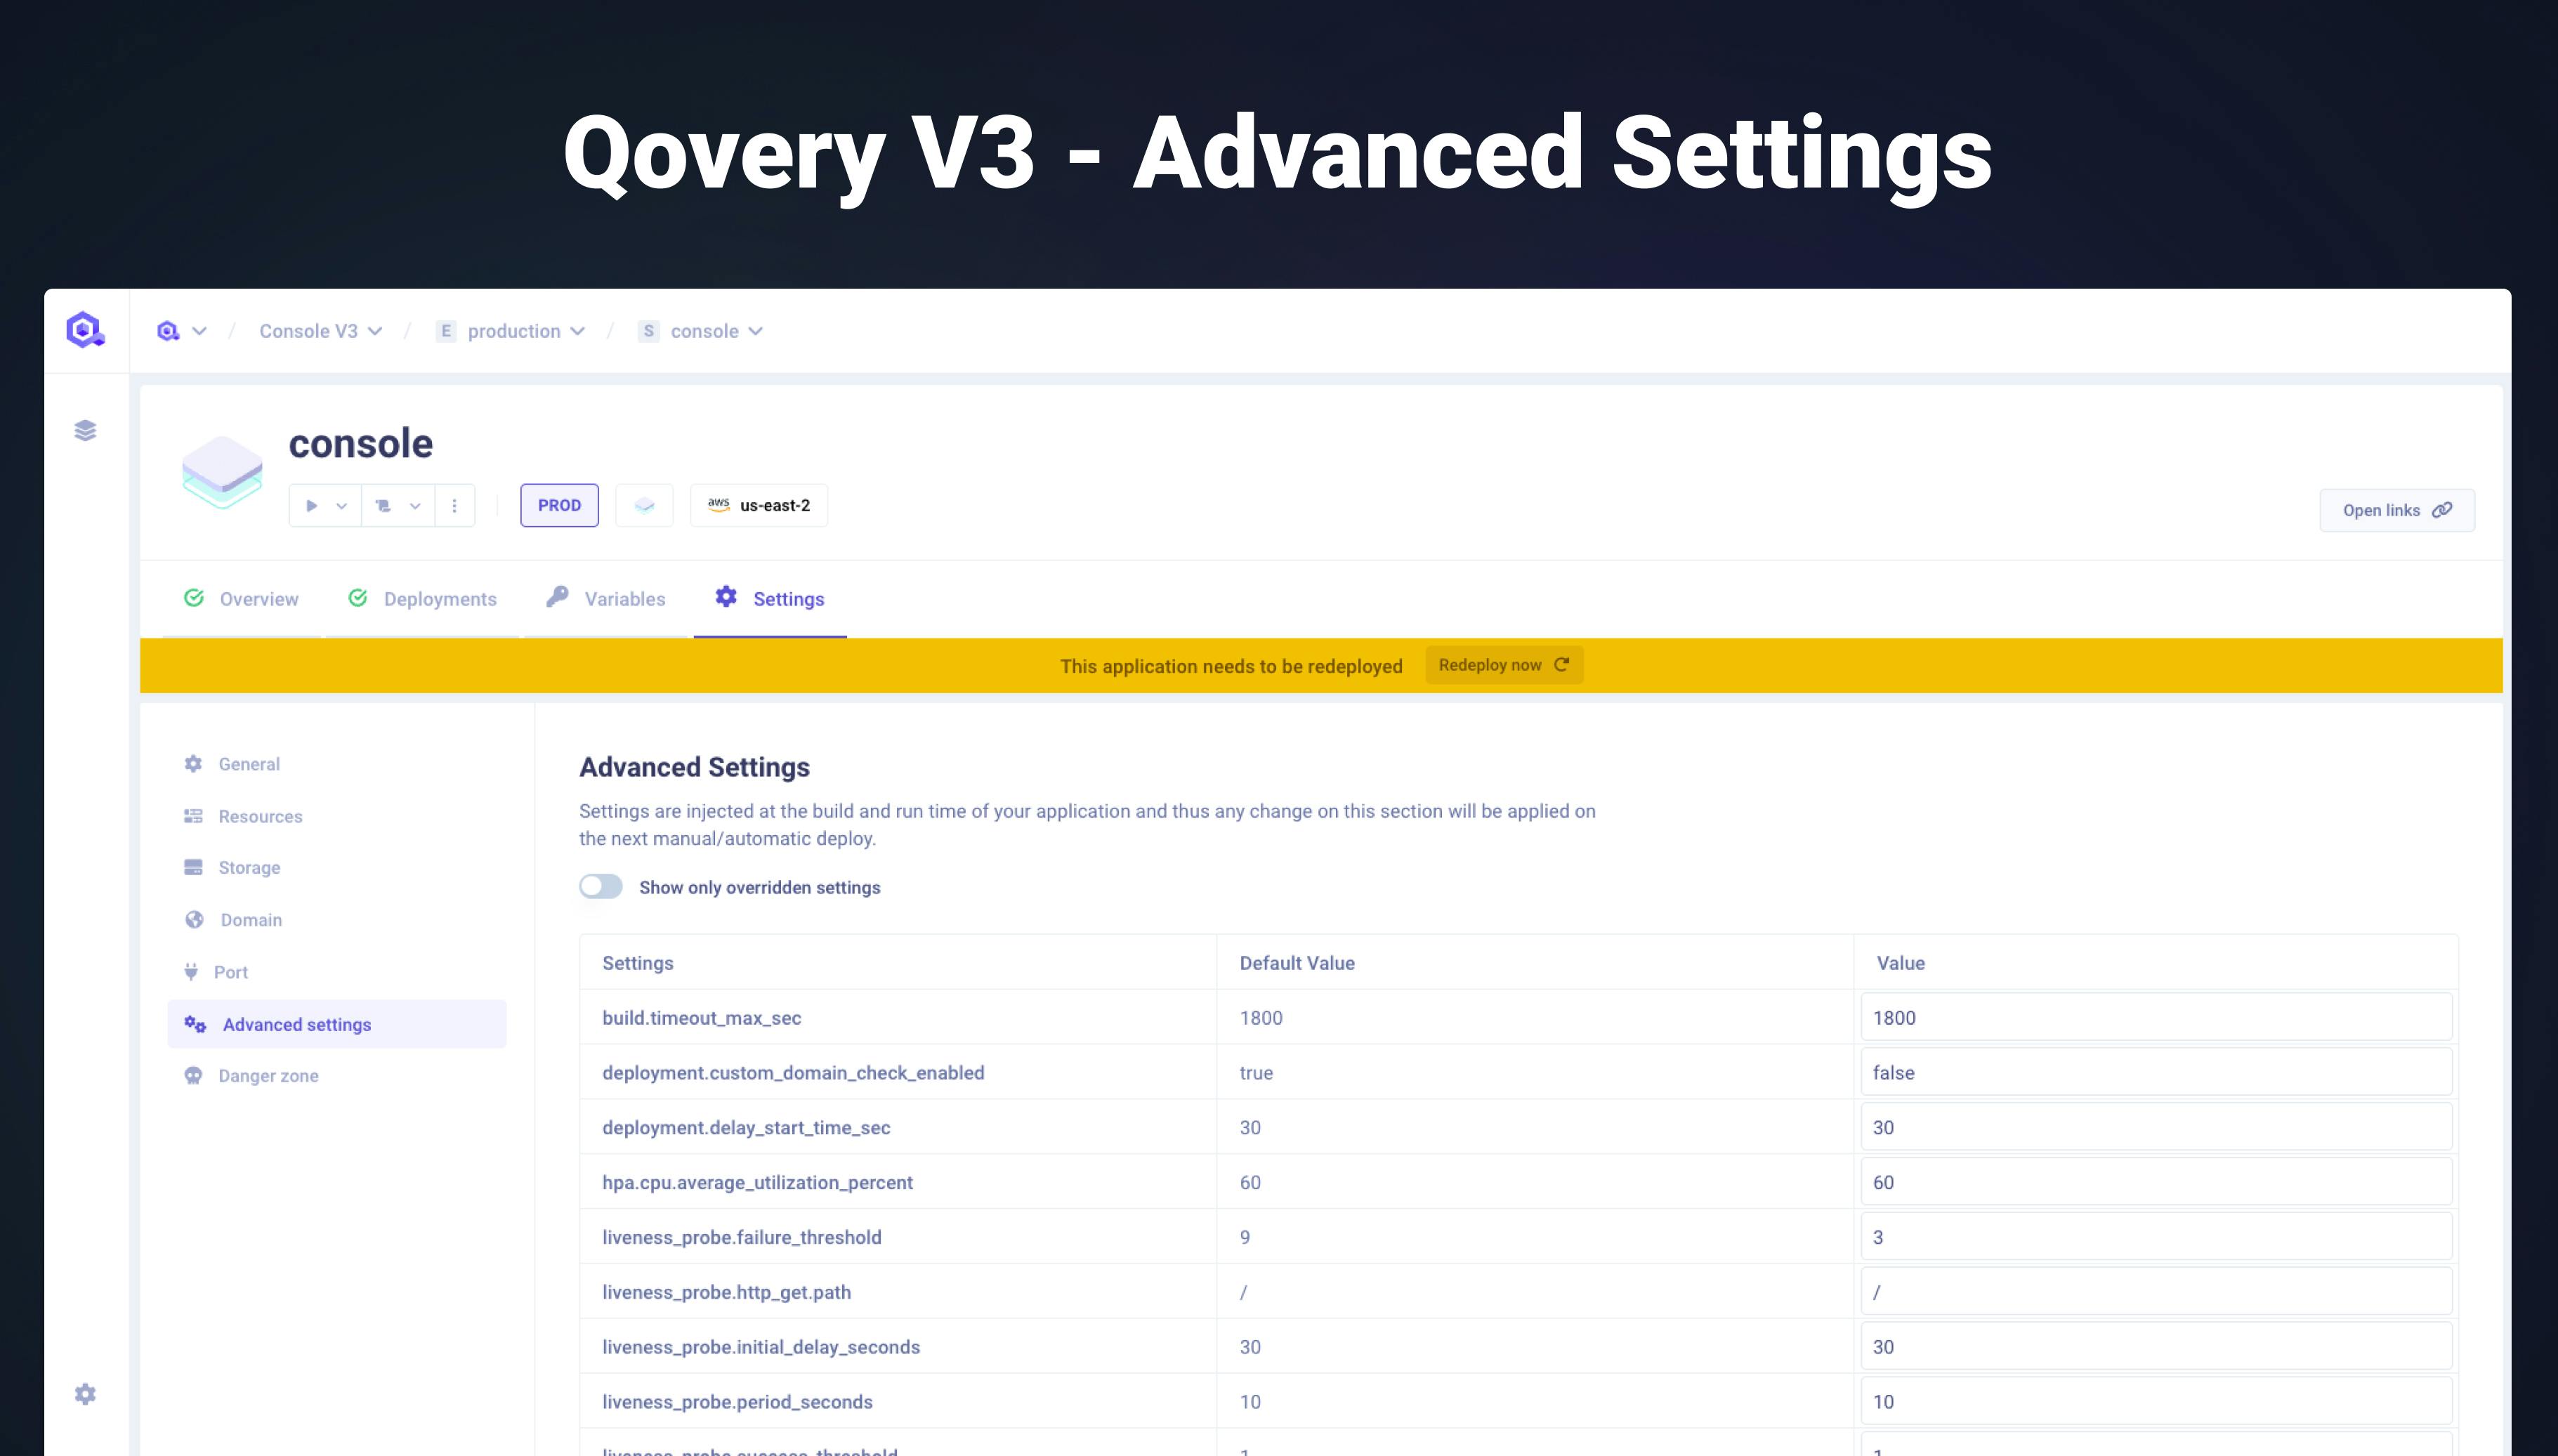
#Why should you consider advanced settings?
Qovery already allows you to customize quite a lot of parameters in your application (RAM, storage, Networks…); for most of our clients, it’s more than enough to have their applications up and running the way they want, but we are aware that some specific industry or more prominent companies might require to further fine-tune their Qovery infrastructure, that’s why we created the advanced settings: a section that you can find in the API on the V2 and in the interface in the V3.
#Our top 3 advanced settings
While I recommend you check all the advanced settings available because there might be the right ones for you, let me tell you about our three most popular ones now available on the V3 interface.
#IP whitelisting
Let’s start strong with a new feature in the V3 console and the V2 via the API: IP whitelisting!
What our user wants, they get, as this was a user request from the forum that got quite popular.
By default, any IP can access your application if it's exposed publicly and the users know the URL. You can limit its access by specifying the IPs you want to reach the app (e.g. the IP of your office)
How to use it in the V3?
Here, a simple click and you are done; head to the advanced settings on the application settings and change the IP to the one you need.
#Application Deployment
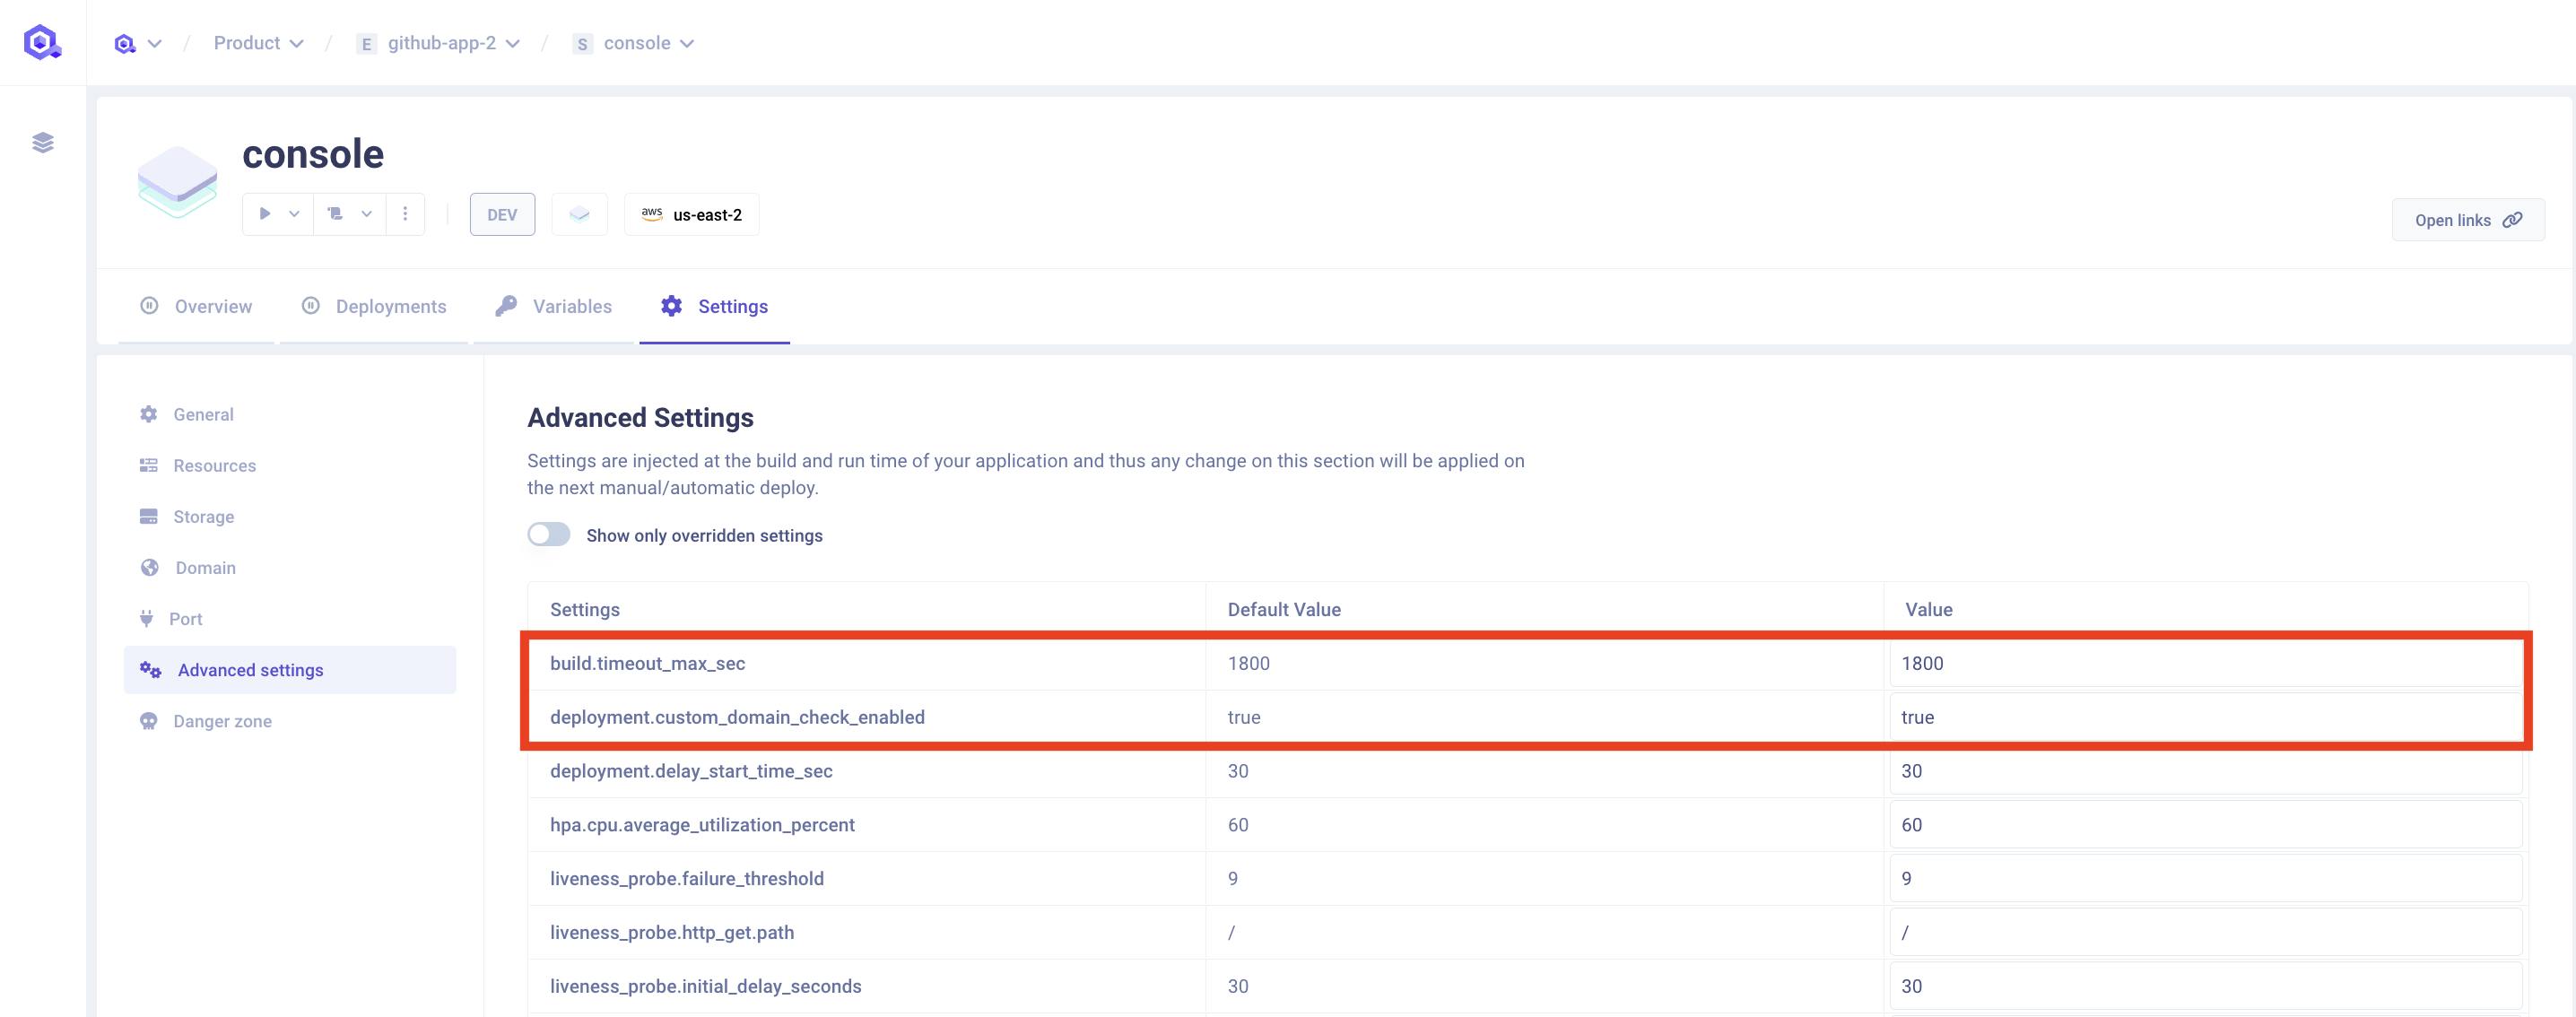
There is two significant addition in the application deployment: build.timeout_max_sec This allows you to specify an interval, in seconds, after which the application build times out. deployment.custom_domain_check_enabled Which disables custom domain check when deploying an application
To know more about it, here is our documentation.
How to use it in the V3?
Again, head to the Advanced Settings inside the application Settings
#Kubernetes Probes
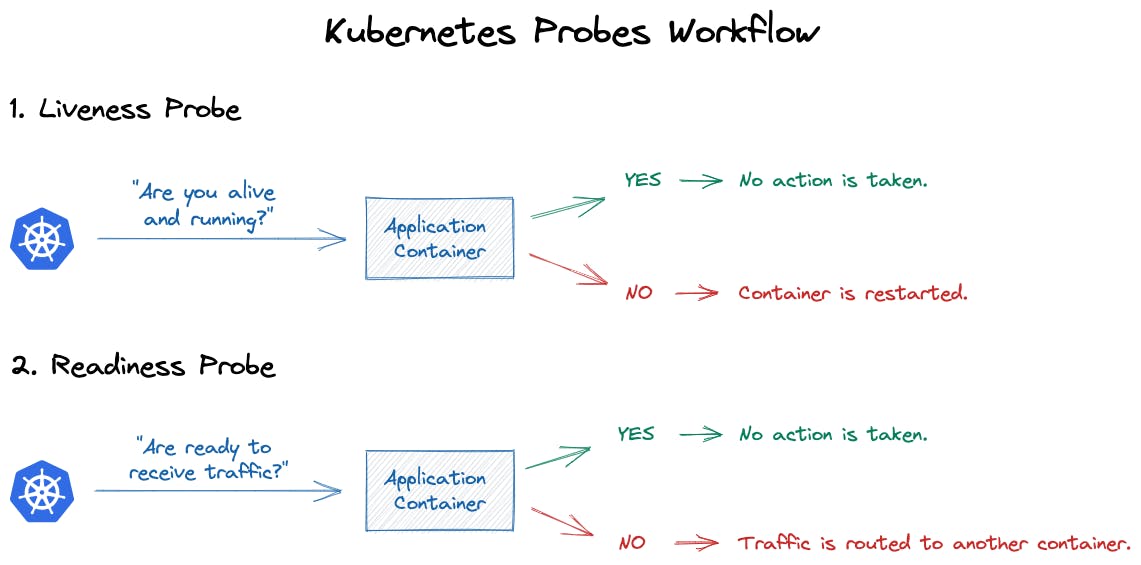
With Kubernetes probes, you can perform health checks to ensure your applications run smoothly. You can configure:
- Liveness probes: to check if the application container is alive (passing) or dead (failing). If the check fails, the dead container is restarted to attempt to heal the application.
- Readiness probes: to check if the application container is ready to receive requests (as even alive containers can enter phases where they cannot handle incoming traffic). Kubernetes only routes traffic to the application if the check succeeds.
How to use it in the V3?
You can find several Liveness Probe and Readiness Probe in the Advanced Settings inside the application Settings, and you need to change the value to the one you want.


#What’s next?
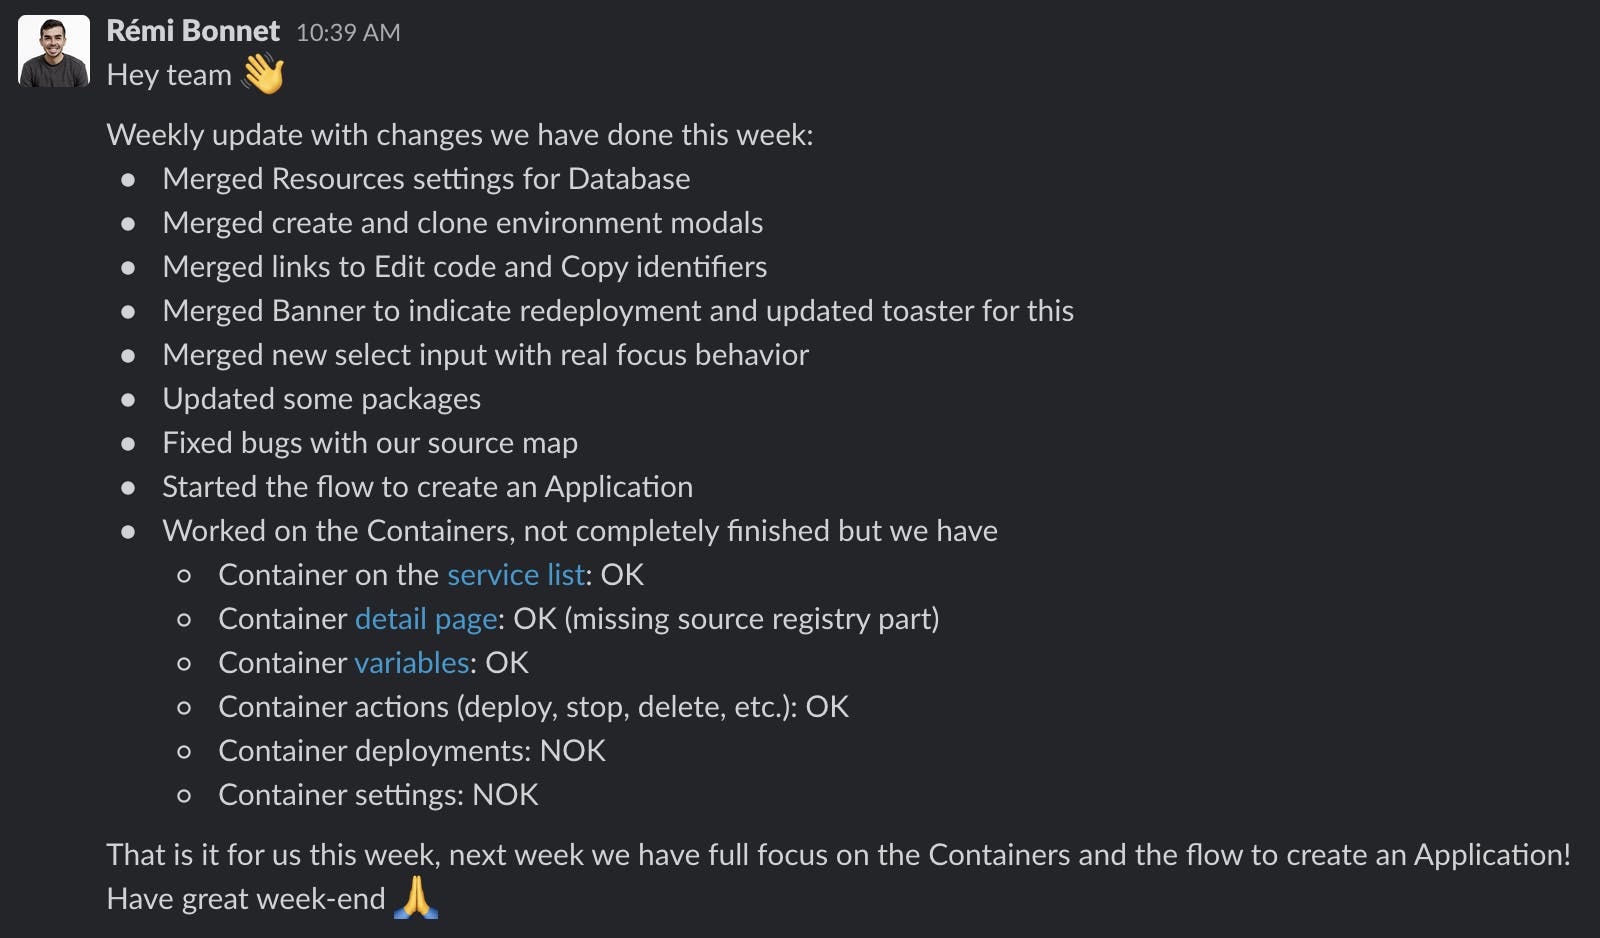
While we are almost ready to deliver the V3 in Beta testing, we still have a few missing features to work on before the release but keep an eye open for news as the Beta should be released at the beginning of Q4. Every week, our Frontend team updates us on the significant progress they achieved, so without revealing everything, let me show you a sneak peek of what you will hear about next in the V3.
Your Favorite DevOps Automation Platform
Qovery is a DevOps Automation Platform Helping 200+ Organizations To Ship Faster and Eliminate DevOps Hiring Needs
Try it out now!

Your Favorite DevOps Automation Platform
Qovery is a DevOps Automation Platform Helping 200+ Organizations To Ship Faster and Eliminate DevOps Hiring Needs
Try it out now!

.jpg?ixlib=gatsbyFP&auto=compress%2Cformat&fit=max)
.jpg?ixlib=gatsbyFP&auto=compress%2Cformat&fit=max)