Qovery V3 is Here
We are excited to announce that Qovery v3 has shipped. Qovery v3 brings new features, as well as an incredibly smooth new UI. This new release introduced infrastructure logs, advanced cluster settings, and many other improvements. Let’s look at some updates and new features added to this release.

Albane Tonnellier
April 1, 2023 · 7 min read
#RBAC
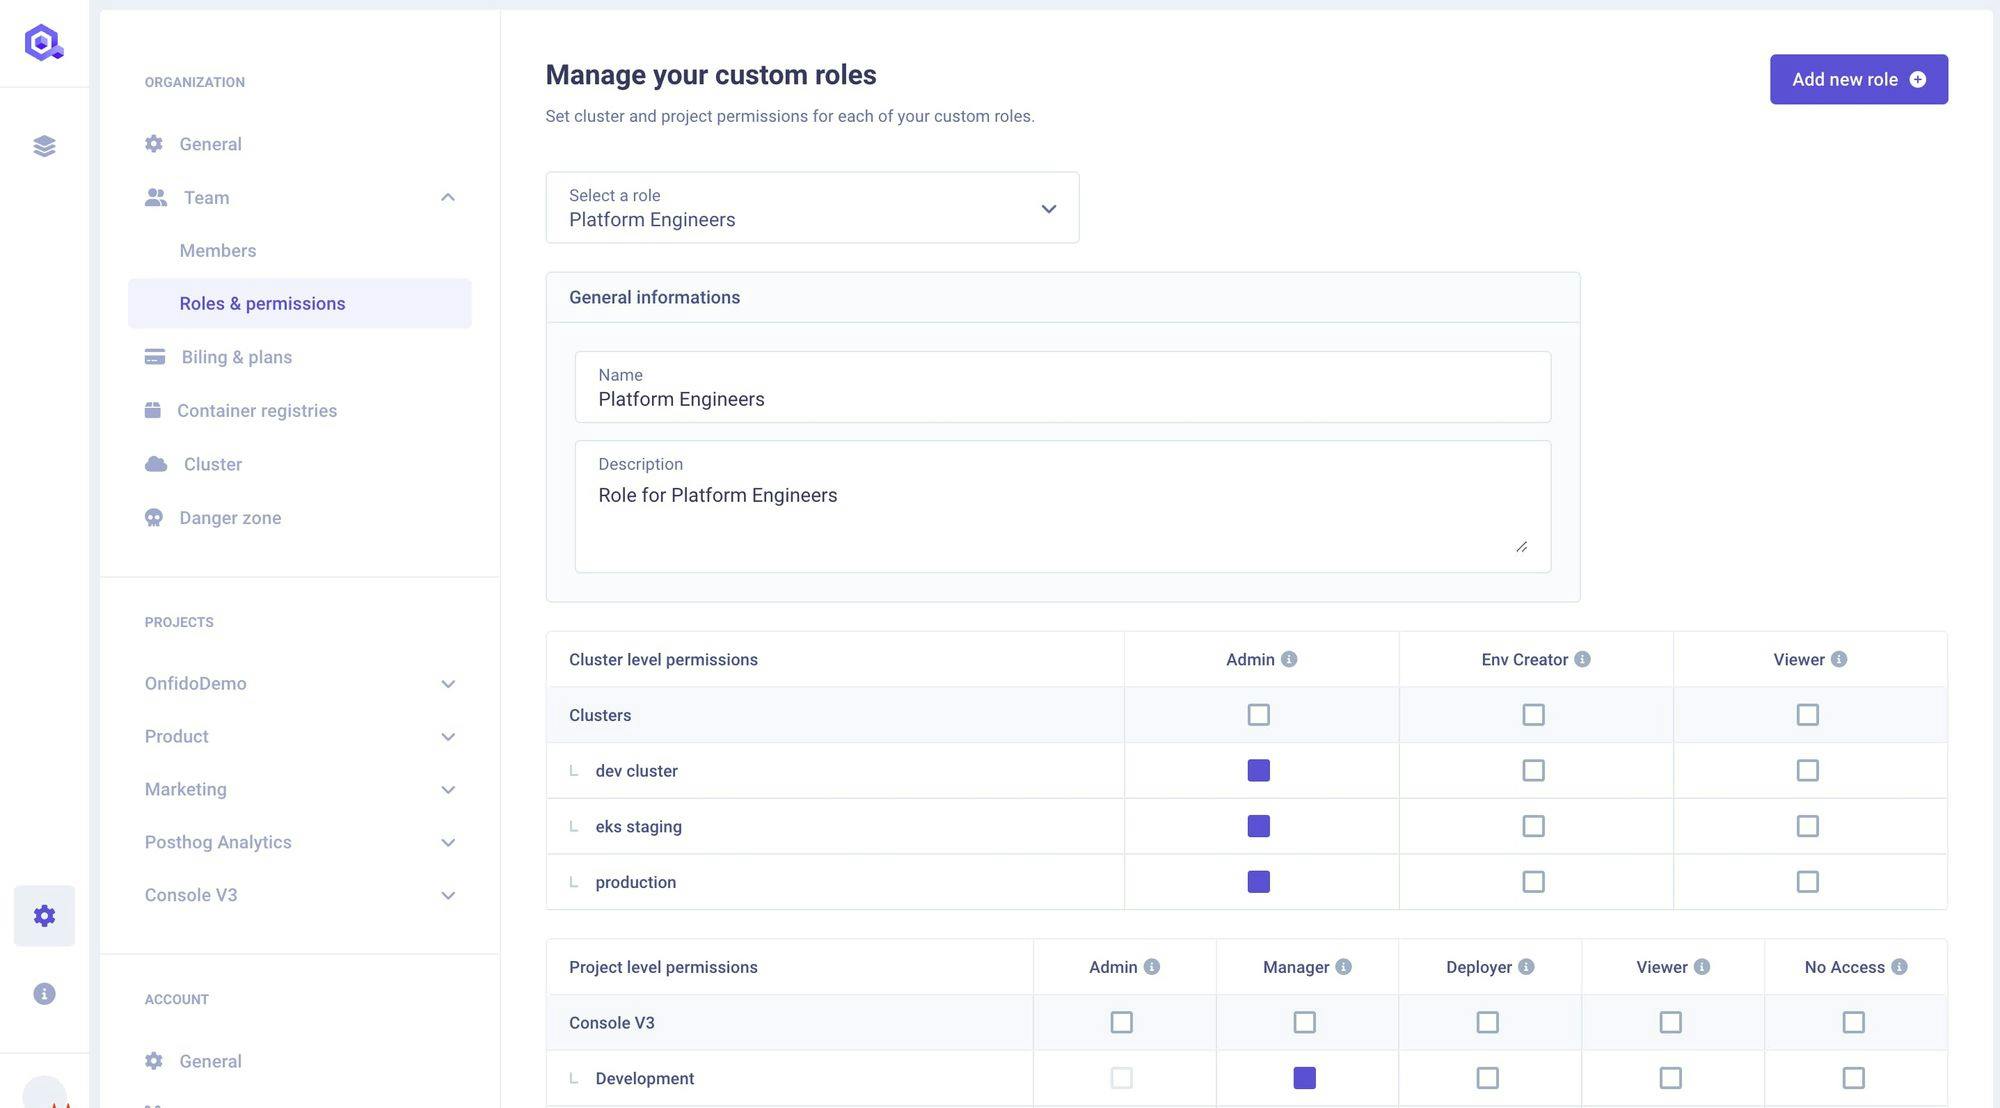
If you don’t know what it is already, the Permissions and Role Management feature enable you, as an organization owner, you want to define specific roles for your organization members so that they can reflect their roles, rights and responsibilities within your organization; it’s now possible thanks to this new feature.
Head to the Organization Settings in the V3, then select Roles and Permissions in the Team Dropdown.
#Logs
#Infrastructure logs
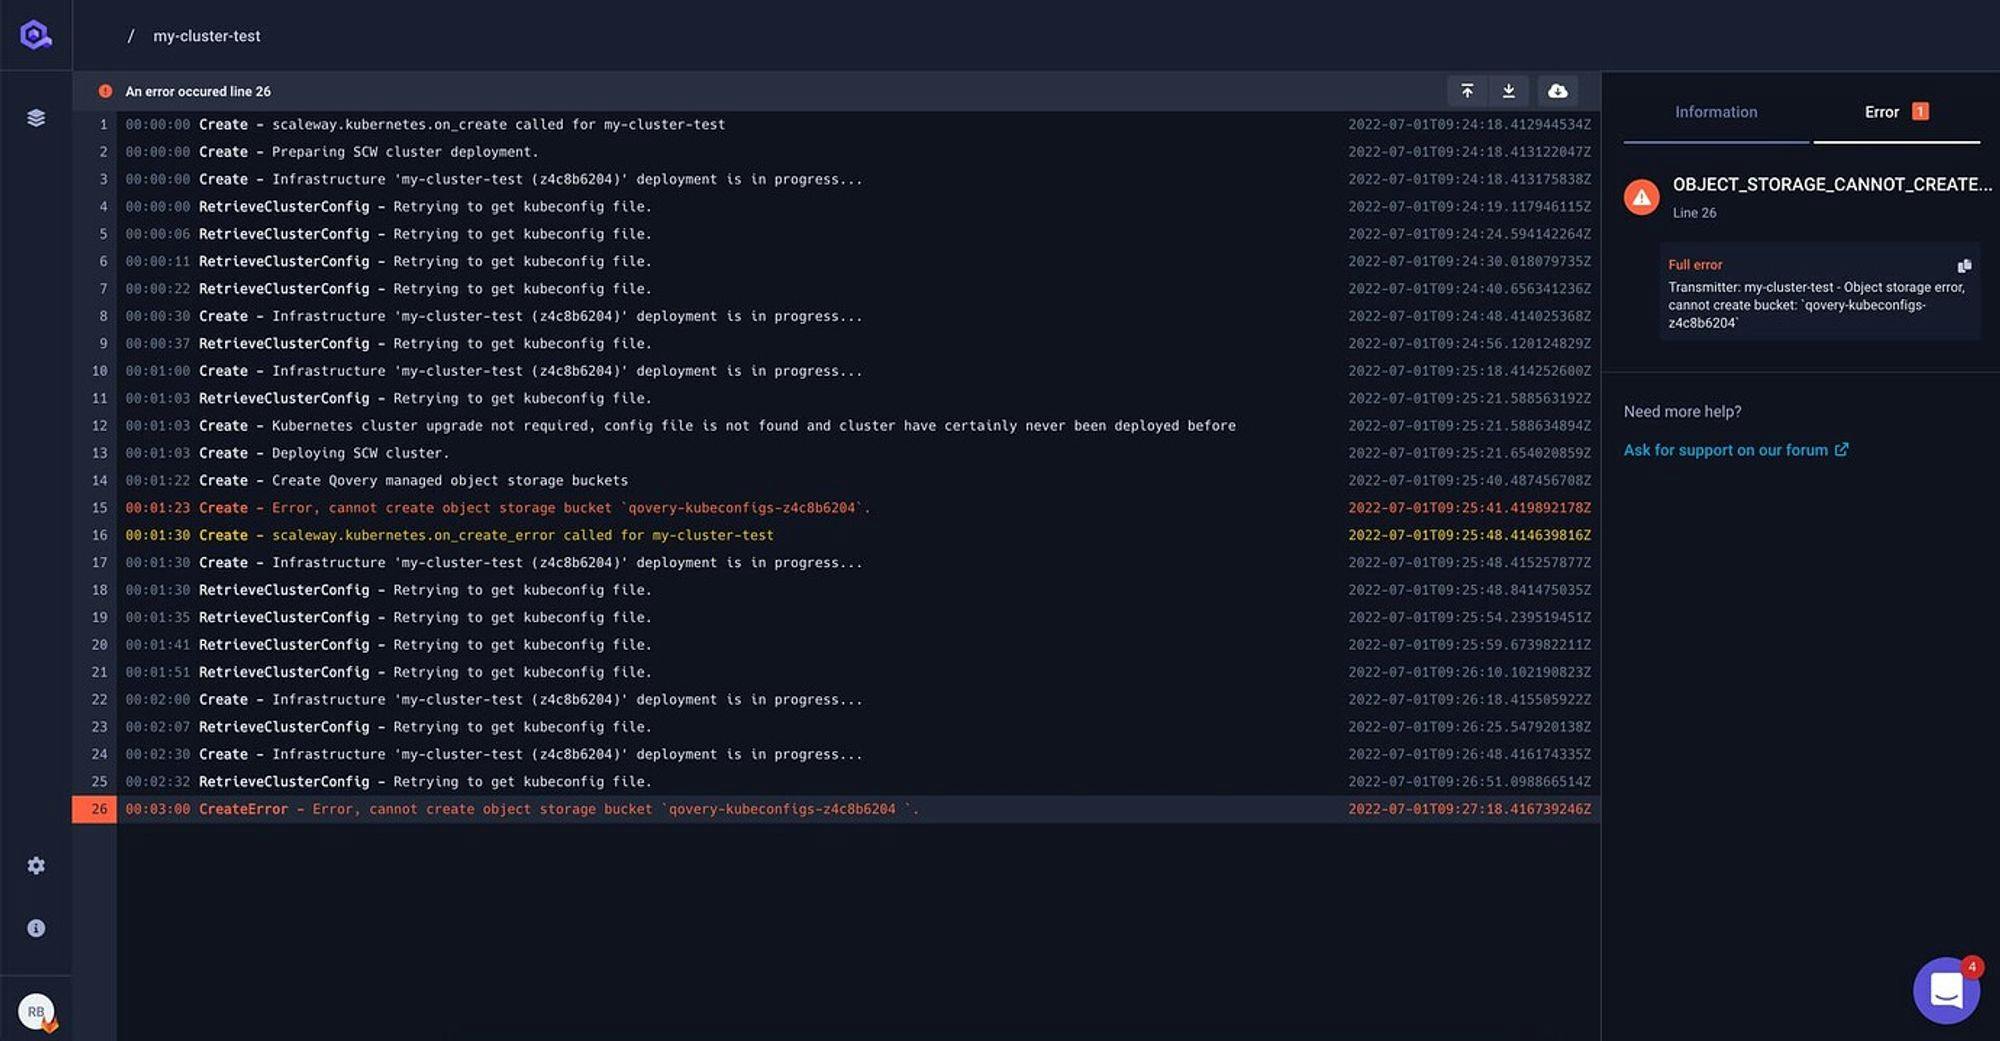
Those logs are here to facilitate the debugging and optimize the visibility and transparency of your infrastructure.
Now, the fun doesn’t stop there because if you have an error, an error tab will automatically display the information of the last issue in the logs.
Can’t wait to see what it looks like, well head to the console and find out for yourself, but if you really can’t wait, here is a snapshot of it:
#Nginx Logs View
Available only with at least one declared port, this option in the application logs is here to help you debut; for more information about the logs format of Nginx, look at this documentation.

#Containers
Most of you have been waiting long to deploy container applications from your private and public container registries. Since we launched Qovery, we were only supporting application deployment from your git repository - now, you can also deploy it from your container registry.
#Why Use Container Instead of Application?
If you already use a CI system and have pushed your container images into your container registry, you might want to use those images and avoid rebuilding them. This is where deploying a container is useful.
Deploying an application is 4 steps - Qovery clones your Git Repository, builds your container image, pushes it into a private container registry, and deploys it.

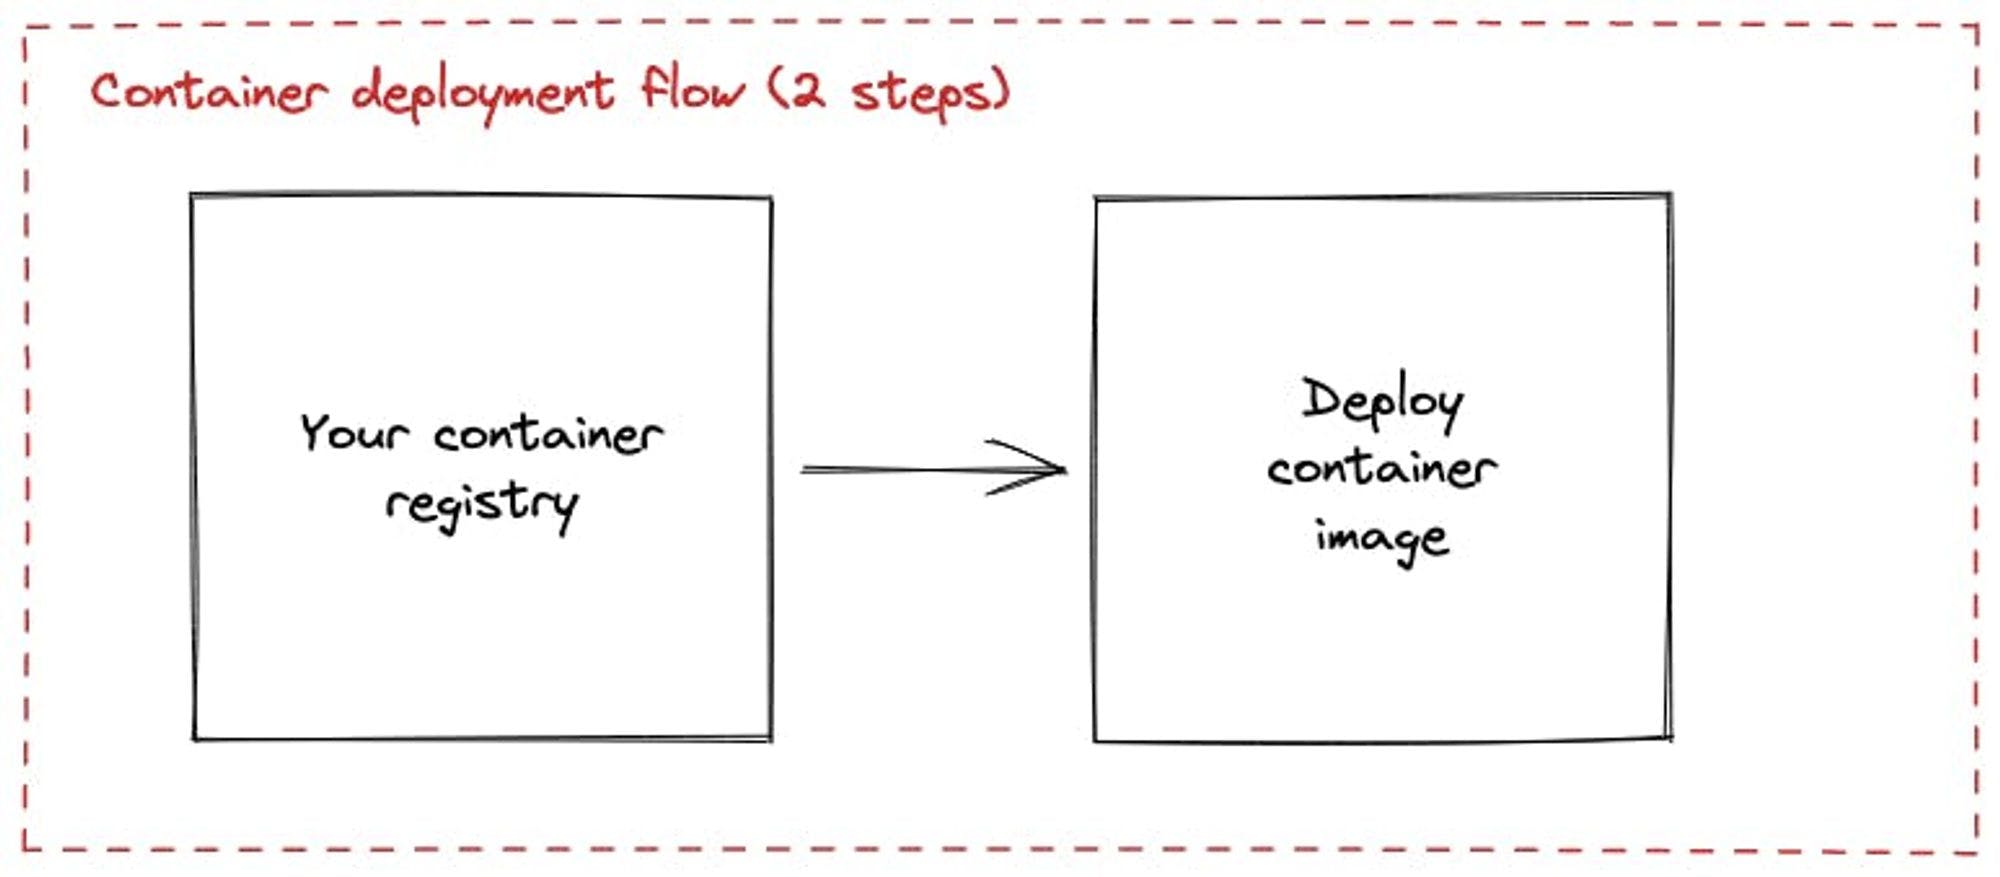
Deploying a container is 2 steps - Qovery takes your container image from your container registry and deploys it.
If you want to know how to do it, here are some further explanations and a tutorial that can help.
#Jobs
#Lifecycle Jobs
In this repository, Romaric shows you several ways you can use Lifecycle Jobs, which include:
- Call HTTP endpoint when an Environment is created
- Create and Destroy an AWS RDS instance with Terraform
- Create and Destroy an AWS Lambda with Serverless
- Create and Destroy an AWS EC2 instance with Pulumi
Lifecycle jobs run on a Kubernetes cluster and are executed only when a specified event occurs in the environment. The output files created by the job will be automatically set as environment variables for services within the same environment. These types of jobs are useful for tasks such as seeding a database or creating external resources not natively managed by Qovery.
Qovery allows you to create and deploy jobs from Git Repository or Container Registry.

#Cronjobs
Alessandro, Lead Product Manager at Qovery, joined me during our November Demo Day to talk about Cronjobs, as it was highly expected by most of you.
A cronjob is a type of workload that runs on a Kubernetes cluster on a regular schedule. It can be used to execute tasks on a regular basis, such as pulling data from an external service every hour or processing data in a database. Qovery allows users to create and deploy Cronjobs from either a Git repository or a container registry.
To know more about it, check out our documentation!

#Environment Variables
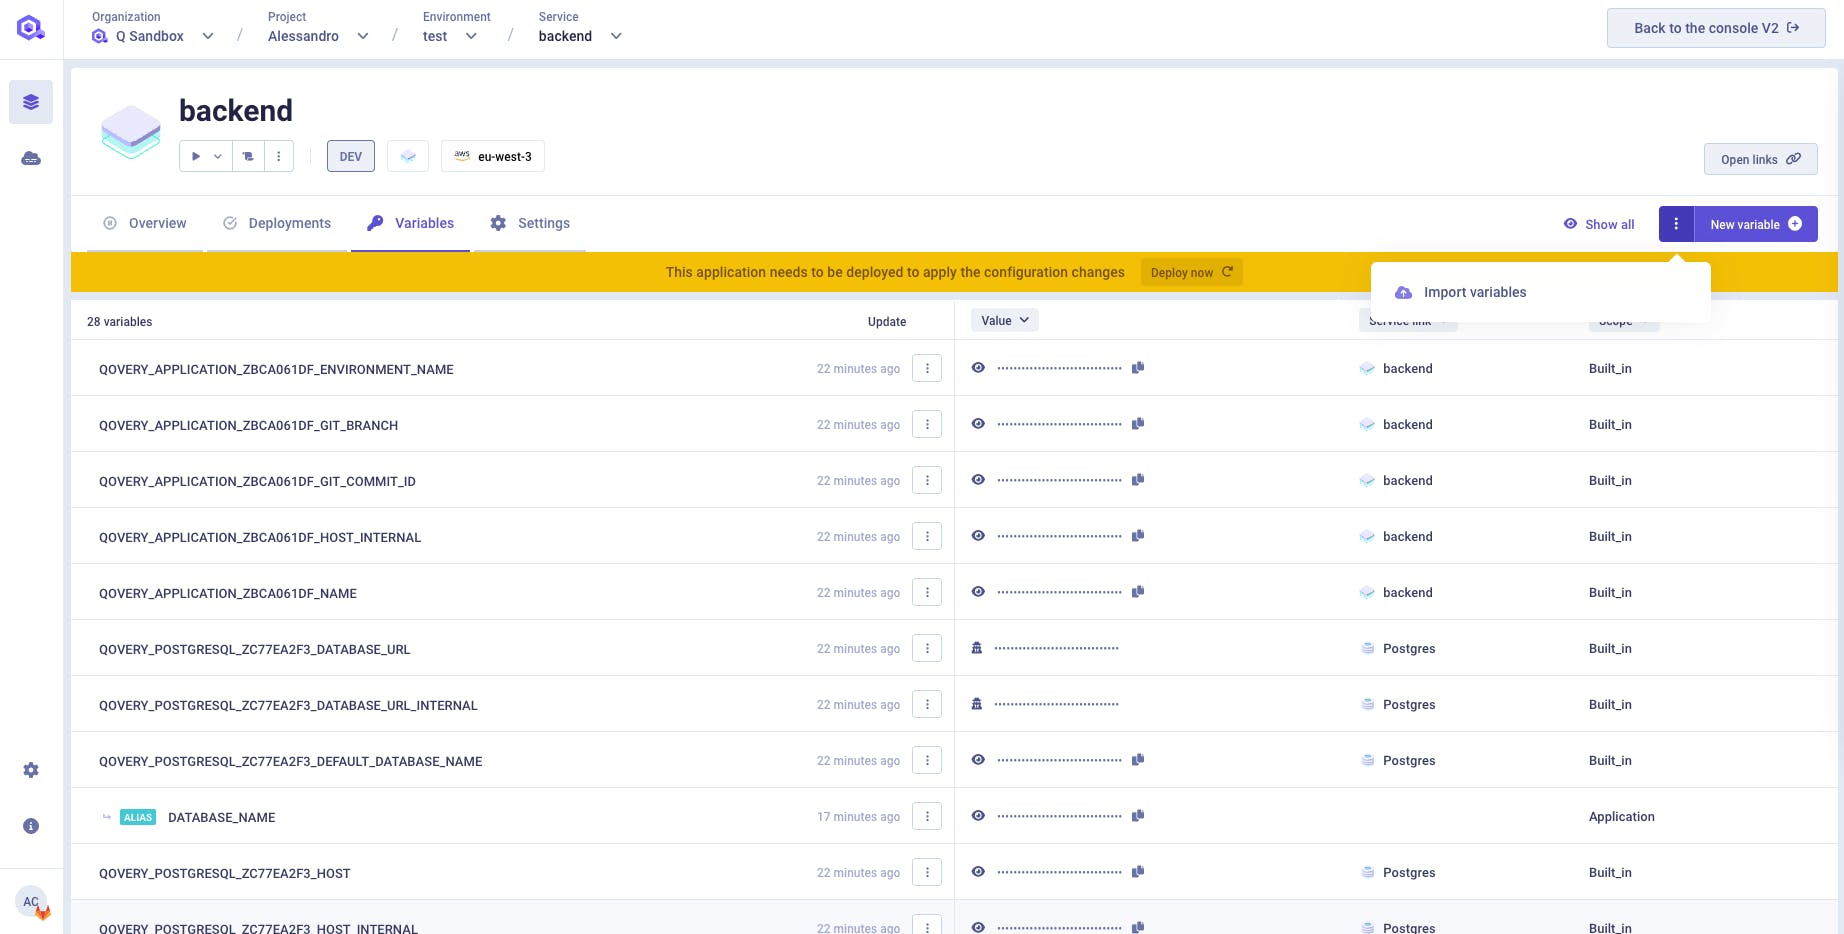
Sometimes you need to pass data to your application. E.g: API key, credentials, debug parameters. For this reason, Qovery allows you to securely pass your data by using Environment Variables. While those where already available in the V2, there as been a big work done on the V3 to make the environment variables even more powerful, let me show it to you.
#Environment as a File
Qovery has two types of environment variables that you can use. The first type is a classic key/value pair, which allows you to retrieve the value using its name (key) at both build and run time. This means you can access the value associated with a particular key throughout your application's entire lifecycle.
The second type of environment variable, which is new to the V3 is called a variable as a file, which is a bit different. It consists of a key/value/path triplet, where the value is stored as a file on a specified path. During runtime, you can retrieve the path of the file by using the variable name (key). Keep in mind that only text files are supported in this format.
With these two types of environment variables, managing your application's configuration and settings becomes much easier and more flexible.
#Environment Variables Interpolation
You can define an environment variable as a composition of text and other environment variables value (environment variables interpolation). For example, you can define your APP_URL environment variable as a composition of your HOST_URL and HOST_PORT in this way:
- Name = APP_URL
- Value = https://{{HOST_URL}}:{{HOST_PORT}}
If you want to learn more, check our documentation about it!
#Import Environment Variables
You can add a set of environment variables into Qovery by importing an .env file. The .env file contains a list of your environment variables, in a MY_KEY = VALUE format.
To import environment variables into your Qovery environment, follow the steps in our documentation.
#Deployment Pipeline
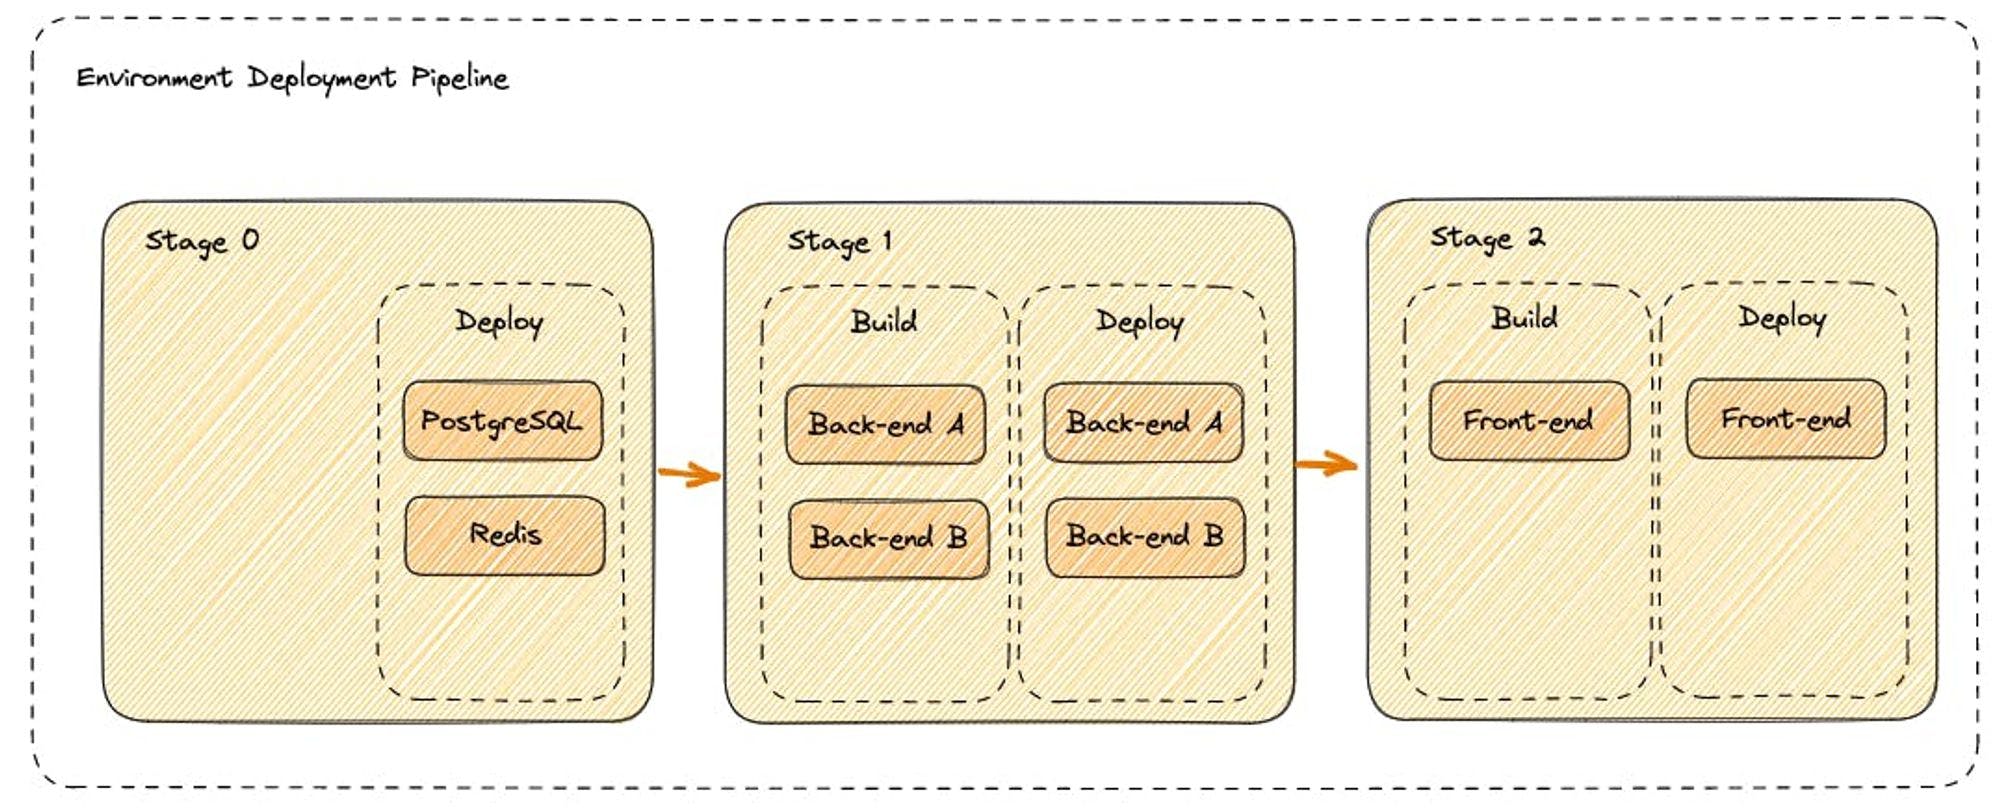
When an environment’s deployment is triggered, Qovery executes what we call the Deployment Pipeline. It defines which operation shall be performed to properly deploy every service defined within your environment (build, deploy, etc.)
A pipeline is composed of an ordered list of Deployment Stages. Each Stage has an execution order assigned within the pipeline: If stage A has an execution order lower than stage B, then B can be executed only if the execution of stage A is completed.
To learn more about it, check out our documentation!
Below you can find a visual example of how the pipeline looks like:
#Manage your Deployment Order with Qovery Deployment Pipeline
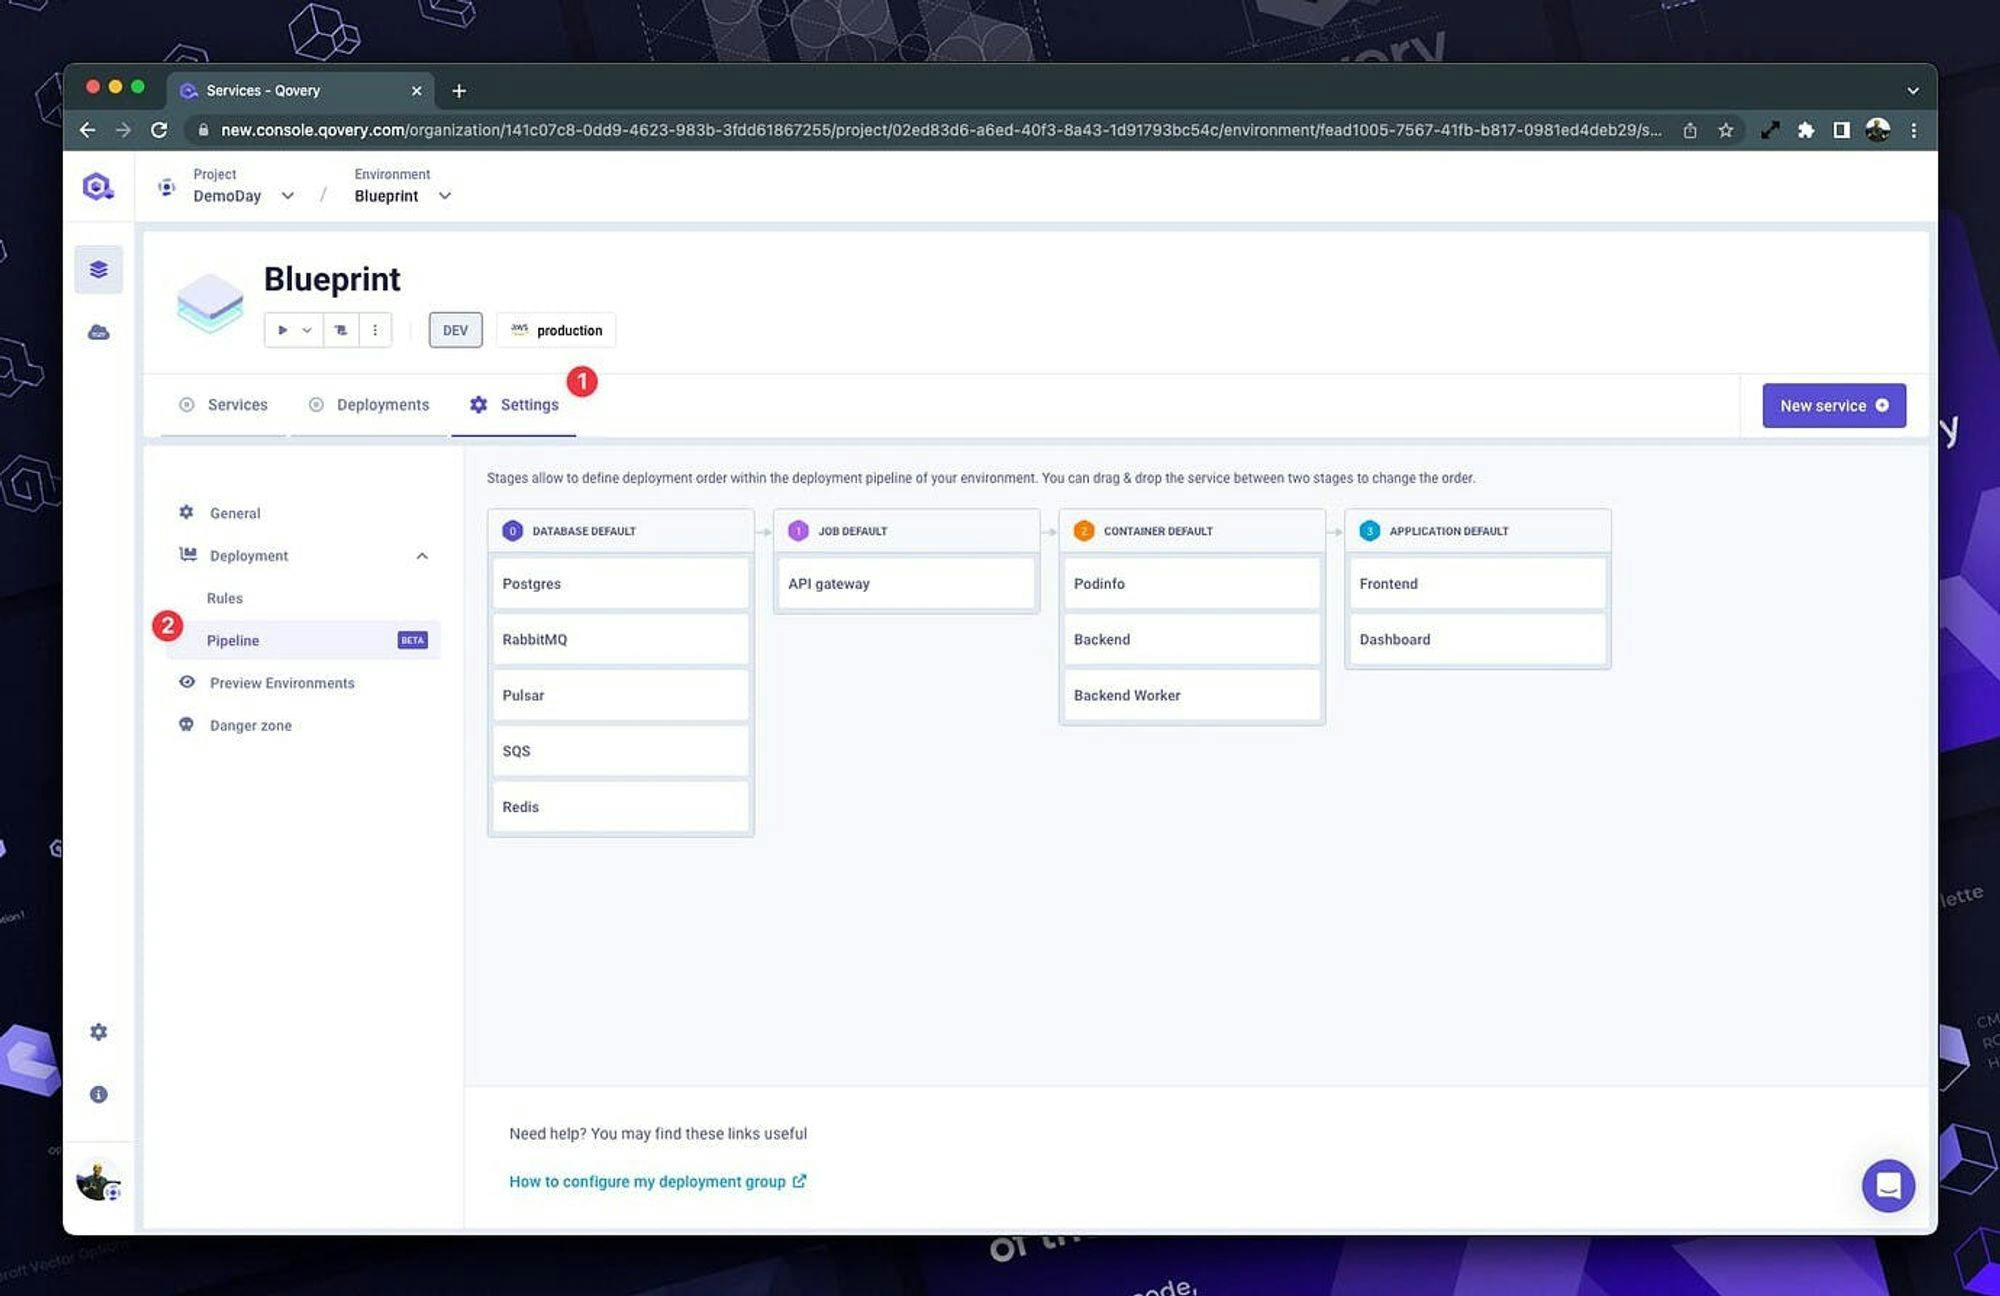
The Deployment Pipeline feature opens the door to many exciting news as we also make it possible to manage your deployment orders. In this forum thread, we went through every step of the process, and if you want to see how it looks in the interface, here is a sneak peek.
#Billing & Plans V3
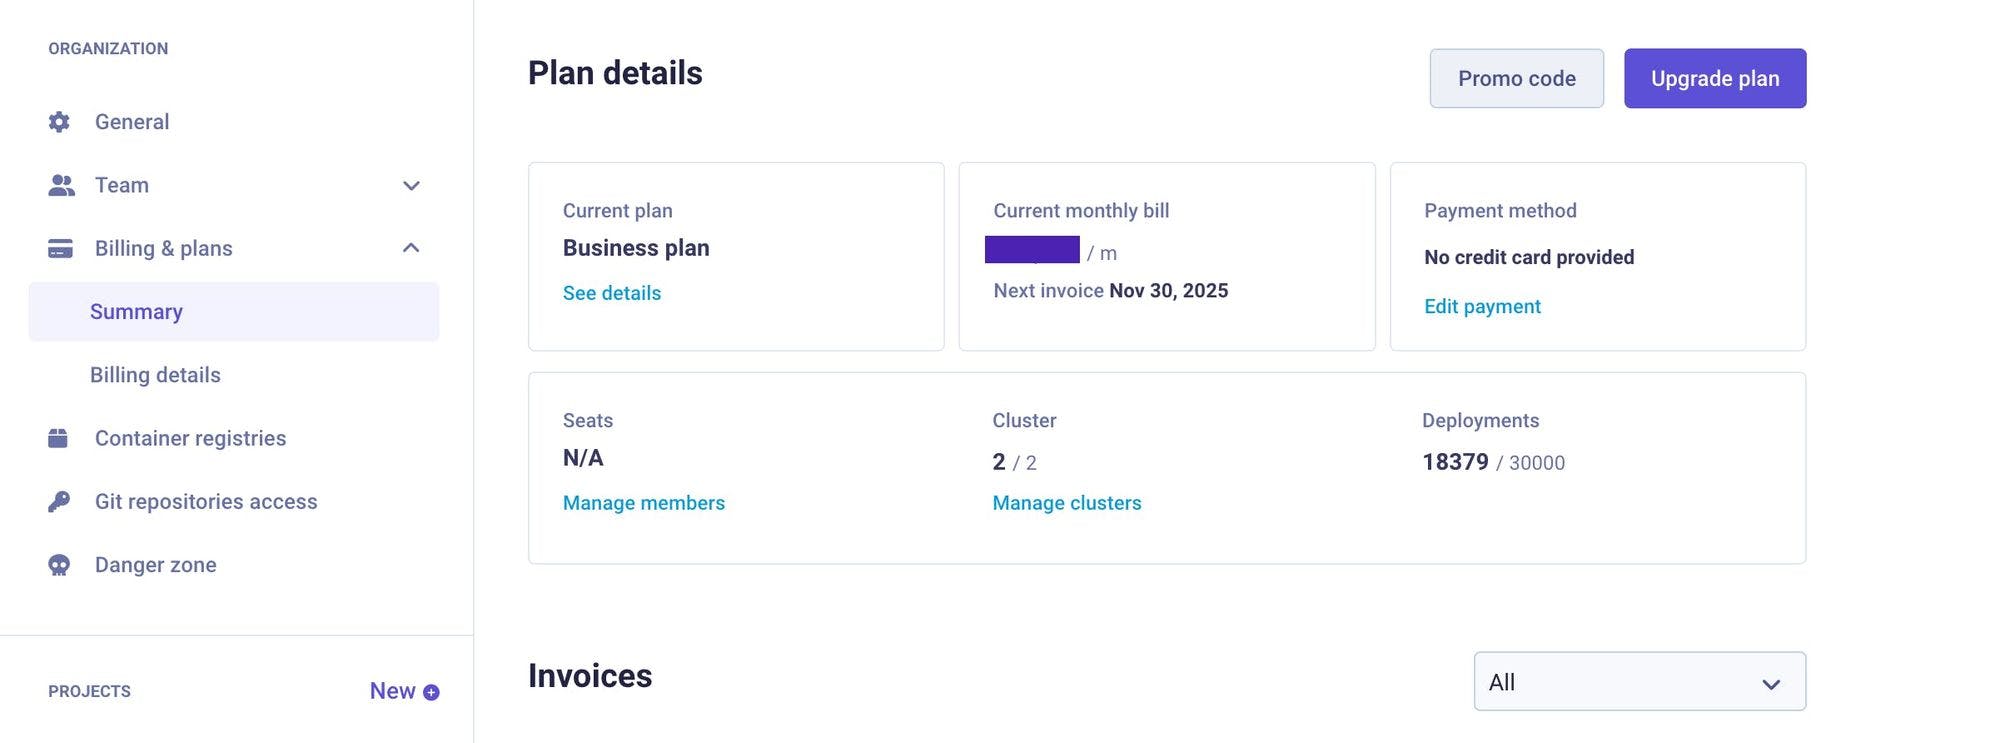
The last remaining block to make the V3 completely ready was the billing and plans part, and this part is now complete; you can now view the details of your plans and add your billing details straight from the V3 interface.
#Cancel Deployment
While you could already Cancel an environment building for a while, you may launch an unwanted deployment (setting error, wrong commit deployed, etc.). You want to cancel the deployment after the build rather than wait for the action to be completed and then perform a rollback, which can be time-consuming; well, it is now possible!
Here is a short video to show you how fast it is to Cancel a Deployment while building (it also works after the build); if you want to take a deeper look, here is our documentation.
#Settings
#Advanced Settings
Qovery already allows you to customize quite a lot of parameters in your application (RAM, storage, Networks…); for most of our clients, it’s more than enough to have their applications up and running the way they want, but we are aware that some specific industry or more prominent companies might require more, that’s why we created the advanced settings, available directly from the V3 interface.
#Cluster Advanced Settings
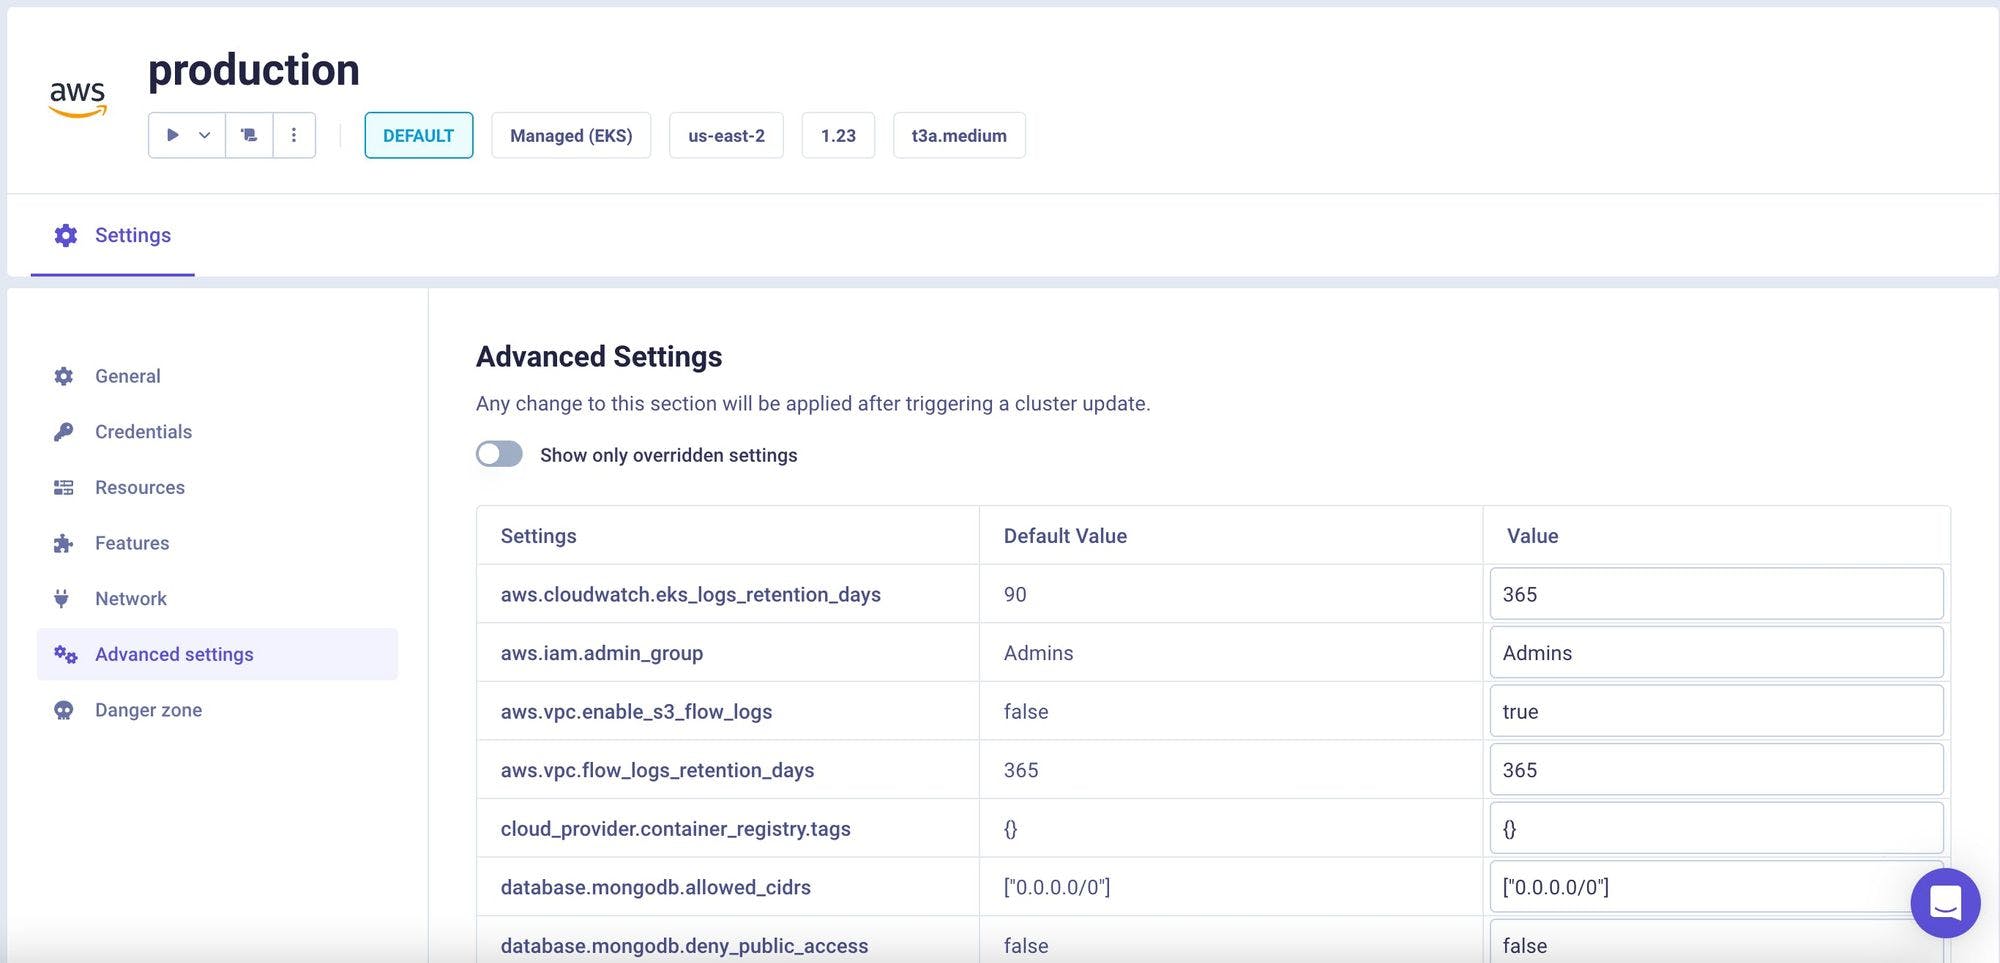
In a previous changelog, I announced that the Cluster Advanced Settings were available through the Qovery API endpoint. If that’s not your thing, it’s also available straight from the V3 interface so that you can fine-tune your Qovery infrastructure further! Here is the documentation for the Cluster Advanced Settings.
#Bonus: Built on React and Open-source
Back to the end of 2021, when we first started to talk about a V3, this was a very hot topic. Our V2 was built in Angular, and the question started to pop up: should we build the V3 in Angular still or in React? After quite a few debates, the choice was made, and our V3 is in React; now, there is nothing wrong with Angular, but we felt like React would be a better choice for future recruitments.
Our new console is open source; you can find the repository here and feel free to contribute.
#The Future of Qovery
With the arrival of V3, we're excited to take things up a notch by offering a more collaborative way for Platform Engineers and Engineering Teams to work together seamlessly with Qovery. Our focus now is to equip you with all the essential tools to optimize costs across your cluster and applications. Let's work together towards achieving greater success.
With all of the great new features, there has never been a better time to try Qovery so if you haven’t try it yet, join us today!
Your Favorite DevOps Automation Platform
Qovery is a DevOps Automation Platform Helping 200+ Organizations To Ship Faster and Eliminate DevOps Hiring Needs
Try it out now!

Your Favorite DevOps Automation Platform
Qovery is a DevOps Automation Platform Helping 200+ Organizations To Ship Faster and Eliminate DevOps Hiring Needs
Try it out now!